Tuesday, August 9, 2011

Strip Tartlets

Music-Modest Mouse- The Moon and Antartica

What an amazing album! I have to admit I have never listened to Modest Mouse very much in the past but nowadays I've been listening to them non-stop! I really enjoy the bassist in the group I think his pretty awesome and his bass lines show much musical finesse. The songwriting is spectacular as well. Though to me they are a very angry and pessimistic  band despite their very optimistic single. Good News For People Who Love Bad News is also a great album from this band as it also includes the legendary Dirty Dozen Brass Band but I am slowly growing more and more onto this album.

Baking-Strip Tartlets with Fresh Fruit(Raspberries, Blue Berries, Peaches)


Delicious? or DELICIOUS!
Well all in all this is a pastry that maximizes your deliciousness to work ratio. It requires very very little work and tastes like ambrosia! and I would know because I have tasted ambrosia! But really it requires almost no work.

The idea behind this pastry is to bake your puff pastry in long big strips and then scoop out the puff pastry middle so you have a little boat shaped puff pastry. Then fill it with Vanilla Pastry Cream and top it off with some fresh fruit!

well first thing is first. You gotta have the puff pastry. Puff Pastry is really annoying to make so I decided to buy my puff pastry from Wegmans. I was checking out the different Puff Pastry brands and it seems to me that the Wegmans brand is best because they don't use anything other than flour, butter, etc. whereas the pepperidge farm has lots of ingredients in it that i can't pronounce and I don't like that. You can make your own (I've done that if you want the recipe then its in older posts)
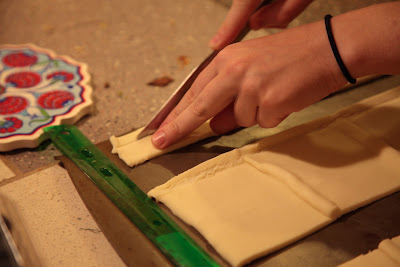


mmmmm...ruler


Driving through the eggwash!

After we thawed out our puff pastry we laid it out and cut it in three even strips lengthwise. Then one of those three strips is to be cut into four smaller even strips. These small strips are then lined on the edges of the other two larger puff pastry strips as shown in the picture!

Brush it with some egg wash (a mixture that is half egg half whole milk). Then its just baking the puff pastry at 375 until it is golden brown (approx 20 minutes). The baking time and oven temperature might depend on what puff pastry you buy or what recipe your using.


Puffed Puff pastry


Scooped Puff Pastry

While the Puff pastry is baking its time to prepare the vanilla pastry cream! This is definitely the hardest part of the recipe (which isn't very hard at all).

You will need:
16 fl. oz of milk
3.5 oz of sugar
a pinch of salt
1.25 oz of cornstarch
6 oz of eggs
1/2 tbsp of vanilla extract
1 oz of butter

1.combine 14 fl oz of milk and 2 oz of sugar and salt in a saucepan and bring to a simmer over med. heat
2. While that saucepan is heating up combine cornstarch with remaining milk and whisk until dissolved and then whisk in remaining sugar and eggs.
3. Then temper the egg mixture by adding about 1/3 of the simmering milk into the bowel while whisking constantly and then returning the mixture to the hot milk in teh saucepan. This is to prevent the eggs from cooking! That would be awful!
4.Continue to whisk very very vigorously until the pastry cream leaves a trail behind the whisk.
5. Remove from heat whisk in vanilla extract and butter and then cool in an ice bath.


THE TEMPER


vigorous whisking!

After the Pastry Cream is done and cooling in the ice bath your puff pastry sheets should be out and cooled. Now just scoop out the middle of strips so that it looks like a little boat of puff pastry. Then spoon or pipe your pastry cream evenly in the little puff pastry boats in even amounts and then top it off with whatever fruits you like! We used peaches blueberries and raspberries but I am sure almost any other fruits would be fine.


Undesirable slacking! Get back to peeling peaches!


Fruits


Strip Tarlets!


Thursday, July 28, 2011

We're back with TWO types of scones!


We're still here! We deeply apologize for being MIA for so long. School got very busy since the last post (wow was it really in December???), and though we did continue to cook and eat, we did not take photos and document the processes. But we're back with a new recipe that you're sure to enjoy.

Music - Genuine Negro Jig by the Carolina Chocolate Drops
This band is from North Carolina, and we just saw them perform at the Grassroots Festival of Music and Dance in Trumansburg. They are a whole lot of fun - with multiple banjos, fiddles, guitars, bone-playing and beat-boxing - oh and a kick-ass female singer who somehow makes bluegrass and Alicia Keys fit together perfectly! This group makes lovely music.

Baking - Dried Cherry and Chocolate Chip Scones
Ham and Cheddar Scones


Though one type is savory and the other is sweet, both of these scones start from the same base recipe for cream scones. The difference lies simply in what you add to the dough, plus a bit of milk-brushing and sugar-sprinkling just before baking. So pick whichever flavor sounds better to you and go for it. Or make them both like we did - they won't last long.

A wall of cheddar cheese, soon to be cubed

First, you combine the dry ingredients - 510 grams of bread flour, 119 grams of sugar, and 30 grams of baking powder. If you're doing both types of scones, do this twice in two separate bowls. Then you add the distinctive ingredients: 1 cup of chocolate chips and 3/4 cup dried cherries OR ham and cheddar cheese (not both).

The ham and cheddar tumbling into their ingredients


Dried cherries and chocolate chips


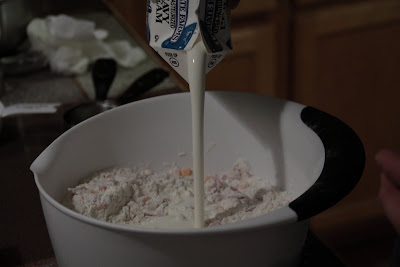
Once they're nice and mixed together, add 14.5 fl oz of heavy cream and mix the dough until combined.


We opted to mix the dough with our hands; it seemed easier that way.


Then divide each dough into two blobs and flatten them into circular slabs that are about 9 inches in diameter. Place them on parchment paper and freeze them thoroughly. This unfortunately takes a long time, so no instant gratification here.

Dough awaiting the freezer

The next day, or a few hours later, preheat the oven to 350 degrees and cut the slabs into wedges. This is tough to do because they're frozen solid, but you want to bake them frozen in order for them to keep their shape, so roll up your sleeves and put your back into it!


Line baking sheets with parchment paper (we used the same paper that the dough froze in) and lay the scones out. Give them a little wiggle room, because they do spread a bit. For the cherry chocolate scones, brush the tops with milk and then sprinkle the scones with sugar. The recipe called for coarse sugar, but normal sugar works just fine.

The scones bake in the oven for 20 to 25 minutes, or until golden brown, and they are simply delicious when the come out.
The cherry chocolate chip scones were lighter, while the ham and cheddar scones were more creamy.
We argued for a while about which was better, but it's really not a problem because they are both extremely tasty. 4 dozen scones barely lasted 24 hours in the house!

Thursday, December 9, 2010

Crepe Cake

Music- Getz/Gilberto-Stan Getz and Joao Gilberto

This is the album that got me listening to jazz music. its intense and its deeply rooted in my love for music. Nothing gets better than the smooth smooth tone of Stan Getz sax and the smooth smooth voice of Joao Gilberto.

Baking-Crepe Cake


This was a relatively easy baking venture taking out the fact that it takes a fair amount of zombie work once you've got the basics down. So there is a story behind why I made this beauty. It was Thanksgiving and my family and other two other "friend" families were having dinner at a family friends house. Things are going a long nicely and there is an eclectic mix of traditional American and Taiwanese cuisine spread out across the table. Everyone is having fun and what not. Then comes time for dessert, I look to find cheesecake bars, cookies, fruit, sweet tofu, and finally this weird cake i've never seen before from a bakery in the Upper East called Lady M. Well it turned out to be a crepe cake (a cake make by stacking crepes on top of each other and having cream in between) and it costs 75 bucks. well you know what? i call bullshit on the price. when i see a 75 dollar cake i see an exquisitely decorated cake with exotic/rare ingredients and complex baking techniques (at least have multiple layers!) Dude puff pastry is more complicated than stacking a bunch of crepes together and croissants are like 2 bucks. i'd pay like 30 bucks max for a cake like that. Maybe 40. its tastes good! but it reality the majority of the cake is nothing really special. Granted its a cool idea but not 75 bucks good. 


So the concept is easy; you stack a bunch of crepes together and slather a thin whip cream mixture in between each crepe. you'll need maybe 20-30 crepes do to this and the cream mixture. both of these things are pretty easy to make. 

for the crepe batter i needed:
6 tablespoons butter
3 cups milk
6 eggs
1 1/2 cups all-purpose flour
7 tablespoons granulated sugar
Pinch salt

for the pastry cream i needed:
1 egg
1 tablespoon all-purpose flour
2 tablespoons granulated sugar
1 tablespoon cornstarch
1 cup milk
1 teaspoon pure vanilla extract
1 teaspoon hot water
2 tablespoons heavy cream, whipped 

So I made both a day in advance (the pastry cream gets more thick as it refrigerates and you need the crepe batter to cool sufficiently). I brown the butter and warm the milk up in a stove until the milk is kinda steaming. First for the batter all i did was mix the eggs, flour, sugar, and salt. and then slowly mix in the milk and butter. when its all nice and watery just store it in the fridge overnight or wait about 2 hours if your pressed for time. 

Browned Butter


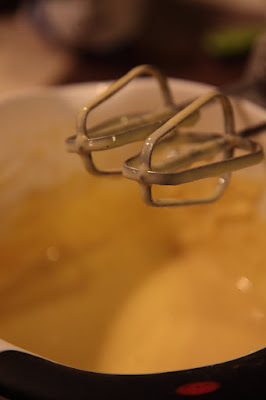
Crepe batter but more importantly my trusty mixer!


Adding hot milk into the crepe batter!


Starting mixture for the Vanilla Pastry Cream!


When you add the milk it'll start to thicken!


Thick.


The pastry cream is fun. I mixed the eggs, flour sugar and cornstarch. Then i heated up the milk until it was simmering on low low heat  (be sure the be whisking often and constantly!). Once simmering occurs remove from heat and whisk into mixture. Put this combined mixture back on the heat and heat until thickened properly or boiling (be sure to whisk A LOT while doing this). add in about a table spoon of whipped cream and mix together. After that is done i just added the vanilla and hot water and stored it in the fridge. 

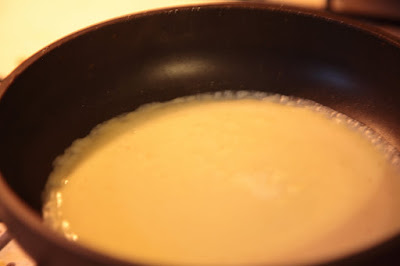
Okay then we fast forward a day and its time to crepify the batter. but first we must prepare the whip cream! So whip with two cups of cream into whipped cream and fold it into the vanilla pastry cream. Now its time to crepe. Im not an super creping expert so it took me a few practice crepes to get it right. i swabbed a good non stick pan with some veggie oil and poured batter onto the pan until it formed a very thin surface on the pan. cook until the edges are brownish (about 1-2 minutes?) on medium heat. then carefully use a spatula or a spoon to lift up and edge and then carefully use your fingers to flip it over. This is ganna hurt. and its ganna be annoying and if you've never made crepes there will be disasters. but its okay with heart, soul, and determination you shall persevere!. I screwed up like twice and brian screwed up like once before we were able to get it kinda decent. After like 5 crepes you'll be a champ though. 

Folding in whipped cream into vanilla pastry


THE POUR


THE COOKING


AFTER THE FLIP. We actually tried to get a shot of the actual flipping but its pretty hard to do that.

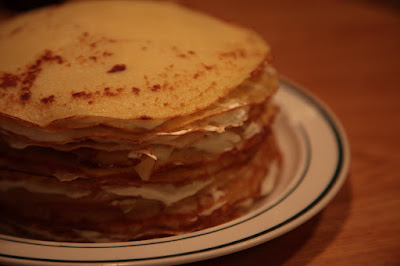
So make as many crepes as the batter calls for (with a small medium ish pan it'll make about 25). To construct cake just place one crepe on a pan, slather on a thin layer of whip cream with a spatula or wide knife, and then place crepe on top of that. repeat this process until you get a beautiful cake. Dust with confectioners sugar. Then refrigerate for like 2 hours and EAT! 
The first layer

The Fourth Layer
Undusted
Still Undusted
THE DUSTING!
The crepe cake may not look delicious at first but when you cut into it it looks beautiful. I guess if you were going all out you could cut off the sides of the crepes but i think thats just wasting beautiful crepe. the cake does not need plastic surgery! it should have higher self esteem than that! you can also replace the whipped cream mixture with other delectable ingrediants such as nutella or you could flavor the whip cream with melted chocolate or green tea (mmmmmm...) 


Heres some more food pics for you:


new profile pic for facebook? maybe.


Laura graces us with her past hand modeling skills


Monday, November 22, 2010

Chocolate Dipped Candied Orange Peels

Music-A Tribe Called Quest-Peoples Instinctive Travels and Paths of Rhythm

Good album! everyone should listen to the tribe! I've been listening to a lot of hip hop lately and really digging the fat beats and fat bass sound. and Tribe really gets into that. So just push it along!

Baking-Chocolate Dipped Candied Orange Peels

Pretty easy but long winded candy making experience with these peels. Not much required but lots and lots of waiting around. They taste delicious though! kind of like...adult tasting. If i were a kid i wouldn't like candied orange peels but if i were sophisticated and adult-y i'd like these orange peels. Personally im indifferent on the taste. Good flavor combination! Chocolate and Orange is a good combo.
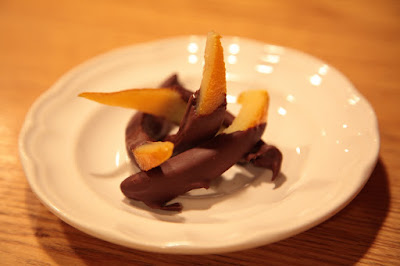
A beautifully artistic picture taken by Brian Sherman

So not much is required all you need is:
-8.5 oz of orange peels
-1 lb of sugar
-4 fl oz of corn syrup
-12 fl oz of water

So first we cut up the oranges into like 16ths so we got thin slices of peels. we used like 9 oranges so we got a lot of peels. We also got a lot of orange. I was planning on making orange juice with all these oranges but instead i just slowly ate all of them while making the candied peels.
Orange Peels Sliced!
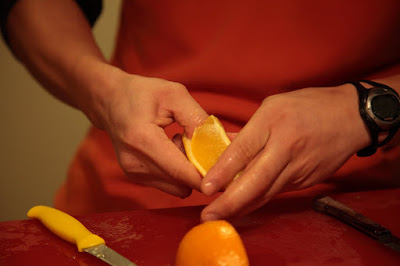
Peeling Oranges!

Oranges
Orange Peels
So you take all them orange peels,put them in a pan and fill the pan with cold water. Afterwards bring the cold water to a boil and then drain. Repeat this 3 more times. This process removes the bitter flavor from the pith.
We did double batches to save time

Afterward combine the water, syrup and sugar in a pot and bring to a boil. Stir it around often to dissolve the sugar and dump the peels in the pot and simmer for about an hour.
Boiling the peels in the sugar mixture
Drying the peels

Then drain and dry the peels on a rack overnight. Melt some semi-sweet chocolate and dip the peels in the chocolate after they are dry! then enjoy!
Final Product!
Final Product off the rack!